
-
×
 Buy Sell Gold M1 Tradingview
1 × $280.00
Buy Sell Gold M1 Tradingview
1 × $280.00 -
×
 Buy Sell ICT Tradingview Indicator
2 × $199.00
Buy Sell ICT Tradingview Indicator
2 × $199.00 -
×
 Bitcoin M1 To M5 Buy sell Tradingview
1 × $259.00
Bitcoin M1 To M5 Buy sell Tradingview
1 × $259.00
-99%


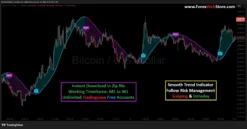
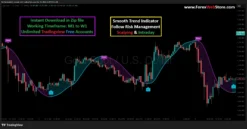
No More Losses Buy Sell Signal Indicator
Original price was: $20,000.00.$180.00Current price is: $180.00.
If you want this indicator then you can pay crypto $1239 (Contact Admin) Click Here
- Original Indicator
- Trading time: Every time
- Instant Download in Zip file
- Working Timeframe: M1 to W1
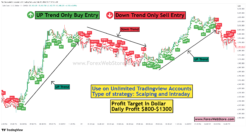
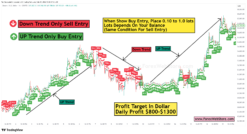
- Use on Unlimited Tradingview Accounts
- Type of strategy: Scalping and Intraday
- Source Code:- Pine script
- Works on All pairs Forex, Crypto, Stock Marke etc.
- Customer Support & Free Upgrades
- Lifetime Version
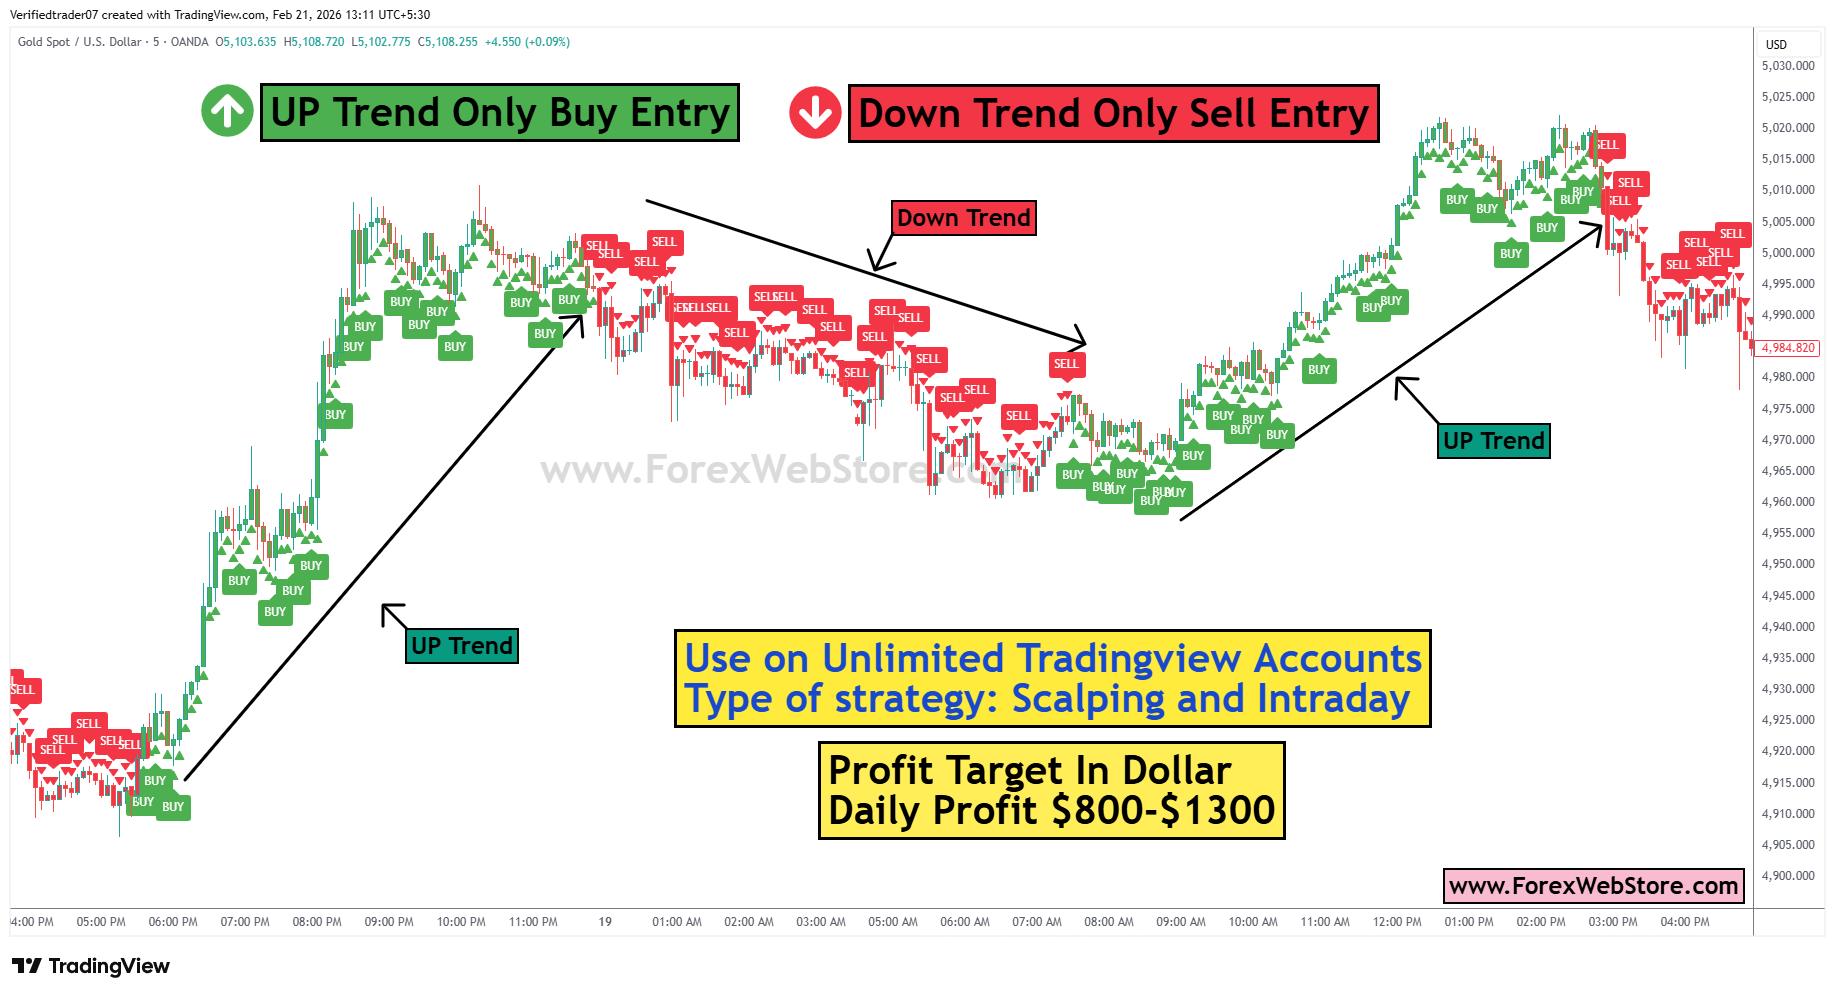
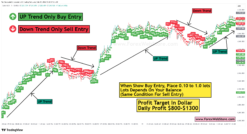
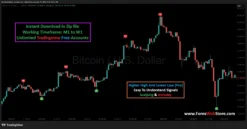
No More Losses Buy Sell Signal Indicator
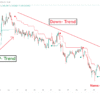
This indicator is a trend-following Buy/Sell signal system.
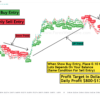
From the image:
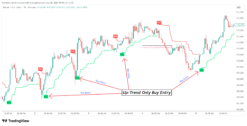
- 🟢 Green BUY signals → Only take in Uptrend
- 🔴 Red SELL signals → Only take in Downtrend
- It clearly says: “Up Trend Only Buy Entry” and “Down Trend Only Sell Entry”
That means the key rule is:
❗ Do NOT take every signal. Trade ONLY in the direction of the main trend.
Now let’s break everything step-by-step.

1️⃣ How To Identify Trend (Most Important Rule)
Before entering any trade:
✅ UP TREND Rules
- Higher Highs (HH)
- Higher Lows (HL)
- Price above moving average (if used)
- Structure making higher pushes
👉 Only take BUY signals
👉 Ignore all SELL signals
✅ DOWN TREND Rules
- Lower Highs (LH)
- Lower Lows (LL)
- Price below moving average
- Market pushing downward
👉 Only take SELL signals
👉 Ignore all BUY signals
2️⃣ Entry Rules
🟢 BUY Setup (Uptrend Only)
- Confirm market is in uptrend.
- Wait for green BUY signal.
- Enter at candle close after signal.
🔴 SELL Setup (Downtrend Only)
- Confirm downtrend.
- Wait for red SELL signal.
- Enter at candle close after signal.

3️⃣ Stop Loss (SL) Placement Strategy
Never trade without SL.
🔹 For BUY:
- Place SL below:
- Previous swing low
OR - 10–30 pips below entry (Forex)
OR - Below recent structure low
- Previous swing low
🔹 For SELL:
- Place SL above:
- Previous swing high
OR - 10–30 pips above entry
OR - Above recent structure high
- Previous swing high
4️⃣ Take Profit (TP) Strategy
Use Risk:Reward ratio.
Recommended:
- 1:2 minimum
- 1:3 ideal
Example:
If SL = 20 pips
TP = 40 pips (1:2)
Alternative TP Methods
✔ Previous resistance (for BUY)
✔ Previous support (for SELL)
✔ Trailing stop after 1:1 RR
✔ Close partial at 1:1, let rest run
5️⃣ Risk Management (Very Important)
This determines if you survive long-term.
Golden Rule:
Risk only 1%–2% per trade.
Example (If Account = $500)
Risk 1%:
$500 × 1% = $5 risk per trade
If SL = 25 pips
Lot size must equal $5 total loss if SL hits.
Why This Works:
Even if you lose 10 trades in a row:
You lose only 10%
Account survives.
6️⃣ Lot Size Guide (General Idea)
For small accounts:
| Account | Risk % | Safe Lot |
|---|---|---|
| $100 | 1% | 0.01 |
| $500 | 1% | 0.01–0.03 |
| $1000 | 1% | 0.02–0.05 |
Depends on SL size.
Never open 0.10 lots on $500 unless SL is very small.
7️⃣ Best Market Conditions For This Indicator
Works BEST in:
✔ Trending markets
✔ London & New York sessions
✔ Gold (XAUUSD) trends
✔ BTC strong moves
✔ Major forex pairs (EURUSD, GBPUSD)
Avoid:
❌ Sideways market
❌ News spikes
❌ Low volatility Asian session (for some pairs)
8️⃣ Advanced Trade Management Strategy
Smart Strategy:
- Enter on signal
- When price reaches 1:1 RR:
- Move SL to Break Even
- At 1:2:
- Close 70%
- Let 30% run with trailing stop
This protects profits.
9️⃣ Daily Profit Target
Do NOT focus on $800–$1300 daily unless:
- Large account
- Proper lot sizing
- Professional level
Better rule:
✔ 2–3 quality trades per day
✔ Stop trading after 2 losses
✔ Stop trading after hitting daily target (2–5%)

🔟 Common Mistakes To Avoid
❌ Taking BUY in downtrend
❌ Overtrading every signal
❌ No stop loss
❌ Increasing lot after loss
❌ Trading during major news
❌ Risking more than 2%
Final Complete Strategy Summary
- Identify trend first.
- Trade only with trend.
- Enter after signal candle closes.
- SL at structure.
- TP minimum 1:2.
- Risk 1–2% per trade.
- Use break-even strategy.
- Avoid sideways market.
Be the first to review “No More Losses Buy Sell Signal Indicator”
Related products
-94%
-96%

Tradingview
Original price was: $3,999.00.$141.00Current price is: $141.00.
-97%
Tradingview
Original price was: $3,999.00.$136.00Current price is: $136.00.
-95%

Tradingview
Original price was: $3,999.00.$180.00Current price is: $180.00.
-94%
Tradingview
Original price was: $3,999.00.$226.00Current price is: $226.00.
-96%
Tradingview
Original price was: $3,999.00.$140.00Current price is: $140.00.
-91%
Tradingview
Original price was: $1,500.00.$132.00Current price is: $132.00.
-89%
Tradingview
Original price was: $2,590.00.$280.00Current price is: $280.00.
Reviews
There are no reviews yet.